XML authoring made easy

FrameMaker is a top-notch long document editor, capable of managing documents that contain thousands of pages. It is built from the ground up with consistency in mind, as you can see from this list of items that you can import from a template in both structured and unstructured documents.
But when you start working with truly large amounts of content, it’s nearly impossible to enforce standards, style guides, and content models. The answer to this problem is structured content, and structured authoring also helps with things like content management, localization (translation), accessibility, searchability, and is even a requirement in the aerospace, defense, and other industries.
Want the webinar version of this post?
I delivered a free Adobe webinar on this topic on May 29, 2018.
Go to https://2018-04-26-framemaker-with-matt-sullivan.meetus.adobeevents.com/ to view the recording.
Structure-ready
Adobe FrameMaker comes equipped to handle structured content. There’s solid support for DITA, S1000D, and other content models, along with the tools needed to install other content models as needed.
In this post, you’ll get an overview of:
- how to create new documents based on different content models
- how structured FrameMaker still allows you to create and work with unstructured content
- the advantages of the XML, Author, and WYSIWYG views
- how to create and modify structure using the structure view, element catalog, and options in the document window
- how to set up legacy content conversions
- the function of a structured template and the role of the EDD in formatting content
- how to customize DITA templates for branding
This post is intended for folks who are exploring the use of structure or getting started with XML authoring. I’ll show you support for DITA, S1000D, and then demonstrate how a custom content model can also be used.
New DITA files
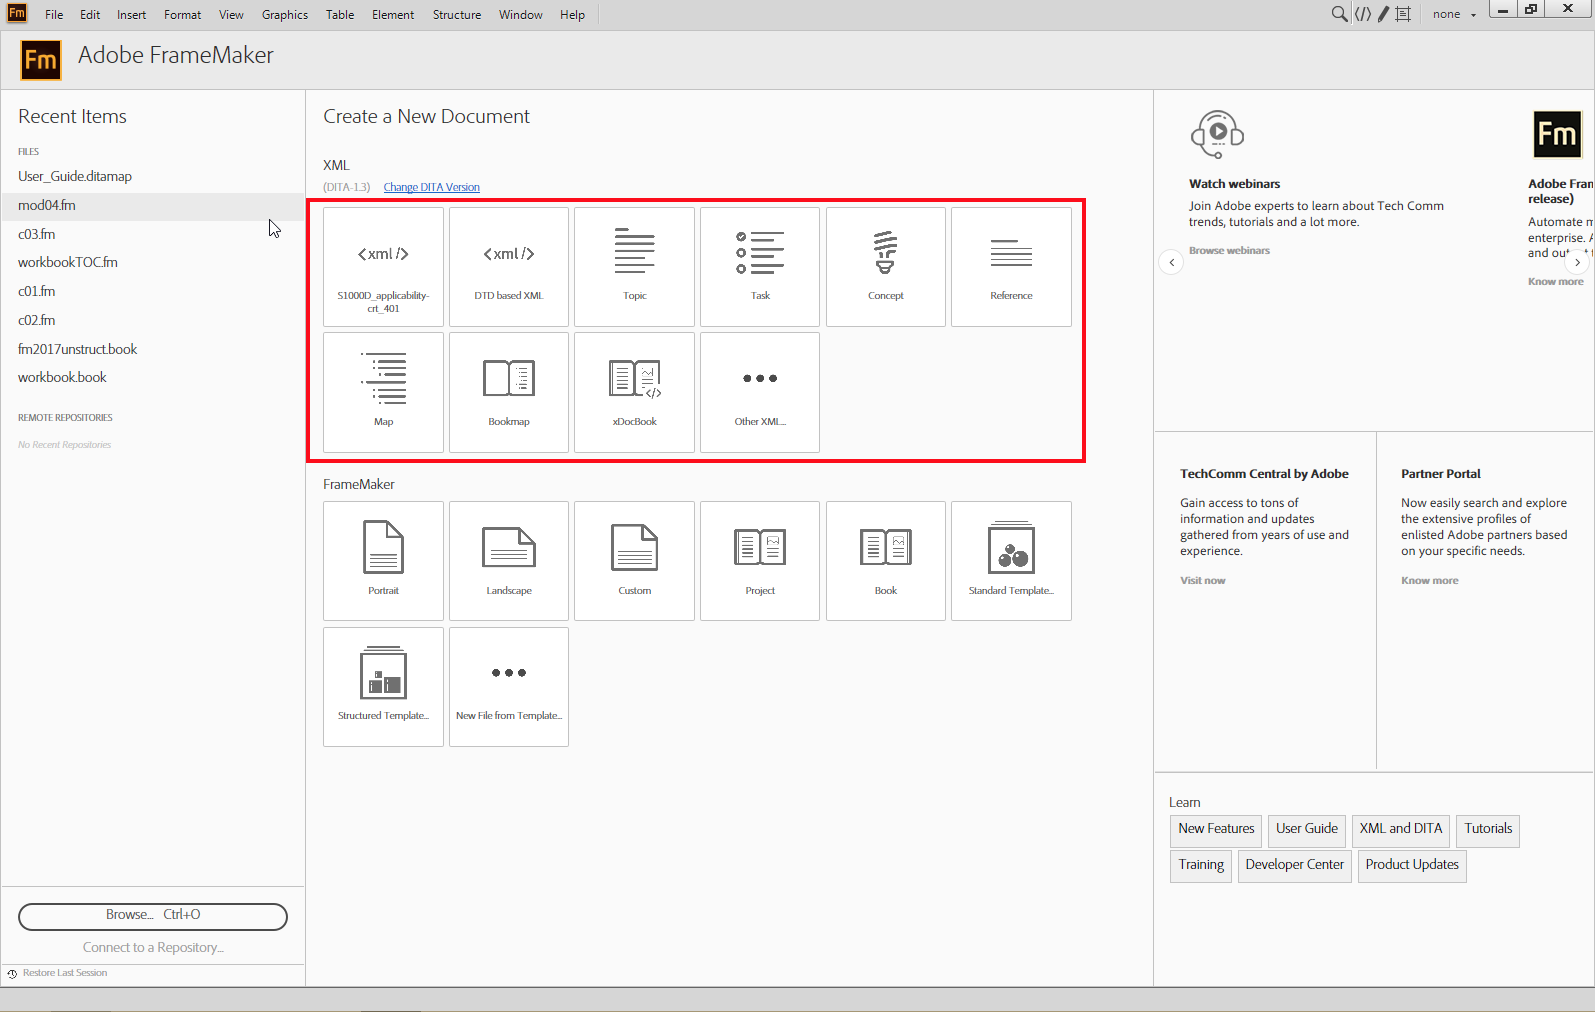
Structure and creation of DITA, in particular, are front and center when you open FrameMaker 2017. DITA files (along with other supported content models) open directly into FrameMaker and have the same comfortable user experience as any other FrameMaker document.
If your organization works with a structure other than one of the baked-in models, you have a structured application designer to help you set up your environment with the things necessary
The three main views in structured FrameMaker
![]()
When working with XML files in FrameMaker you can change between the three available views in the upper right corner of the FrameMaker application window.
NOTE: SGML content models are limited to the WYSIWYG view only.
I’ll go through the main differences between the three views.
![]()
WYSIWYG (What you see is what you get) view
Perhaps the most familiar view in structured content is the one that looks like a printed page. FrameMaker has the ability to show you what the final printed version of your content will look like, and let you make edits in this view. When starting in structure, this view gives you an environment that is relatively close to editing unstructured content in FrameMaker or other editors.
![]()
Author View
This view reflows your content according to the width of your document pane. It also removes the page breaks, headers, and footers. This is a great view when you just want to write, without worrying about the constraints of a specific publishing output.
![]()
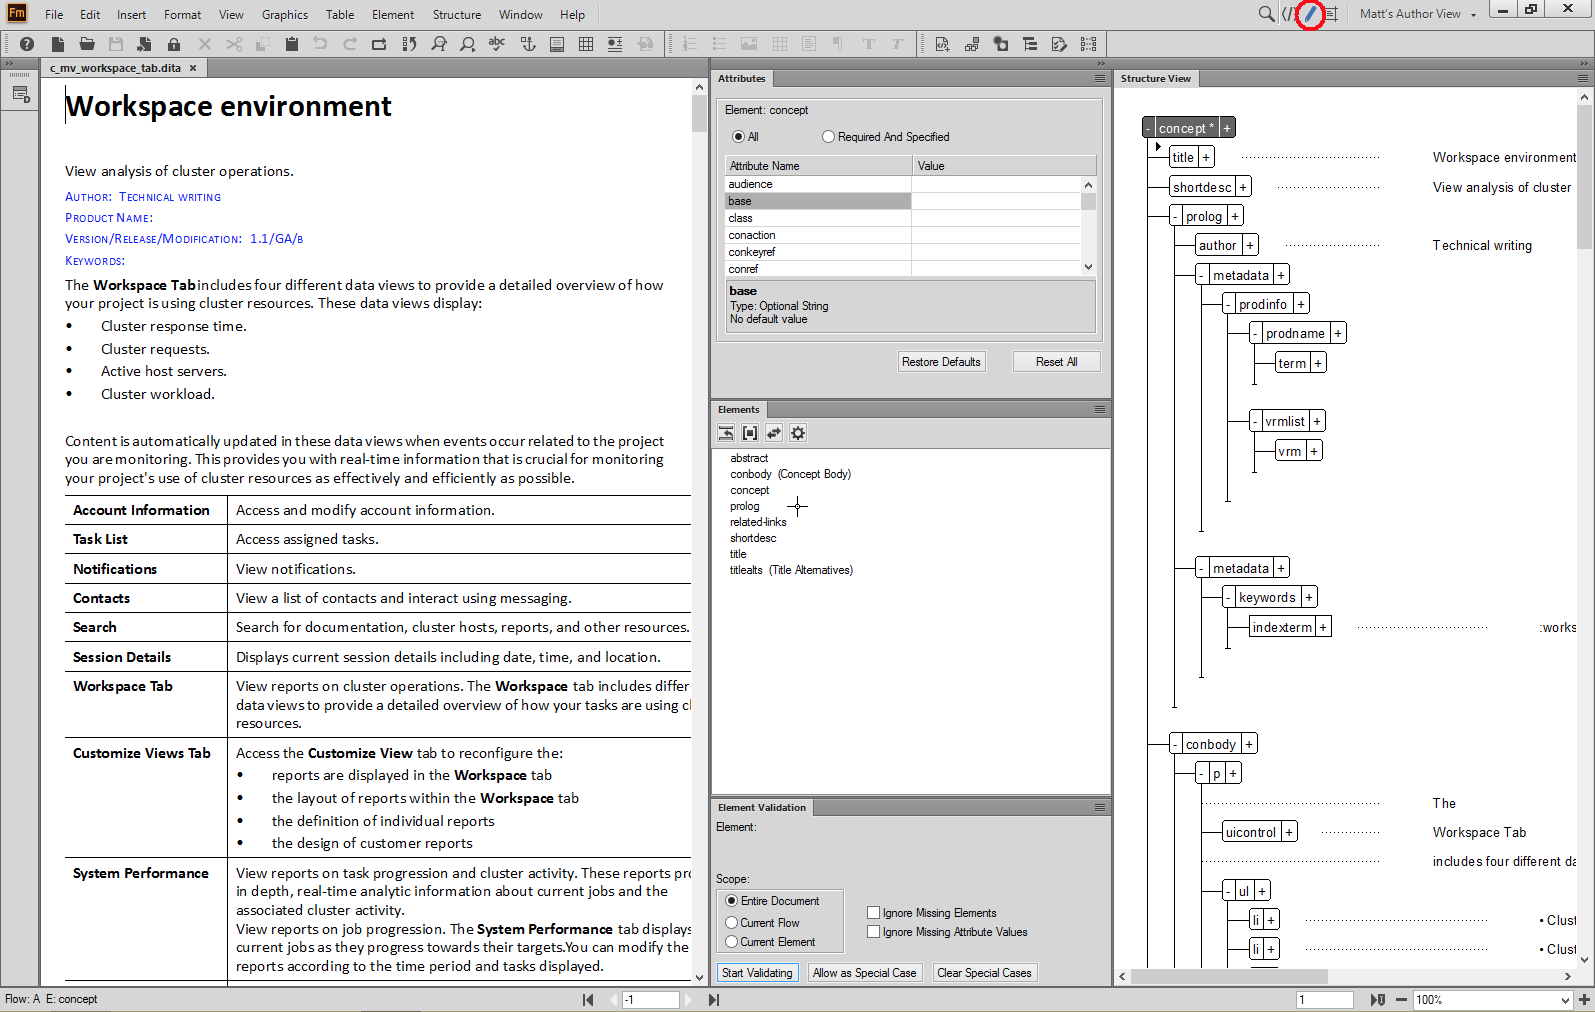
XML View
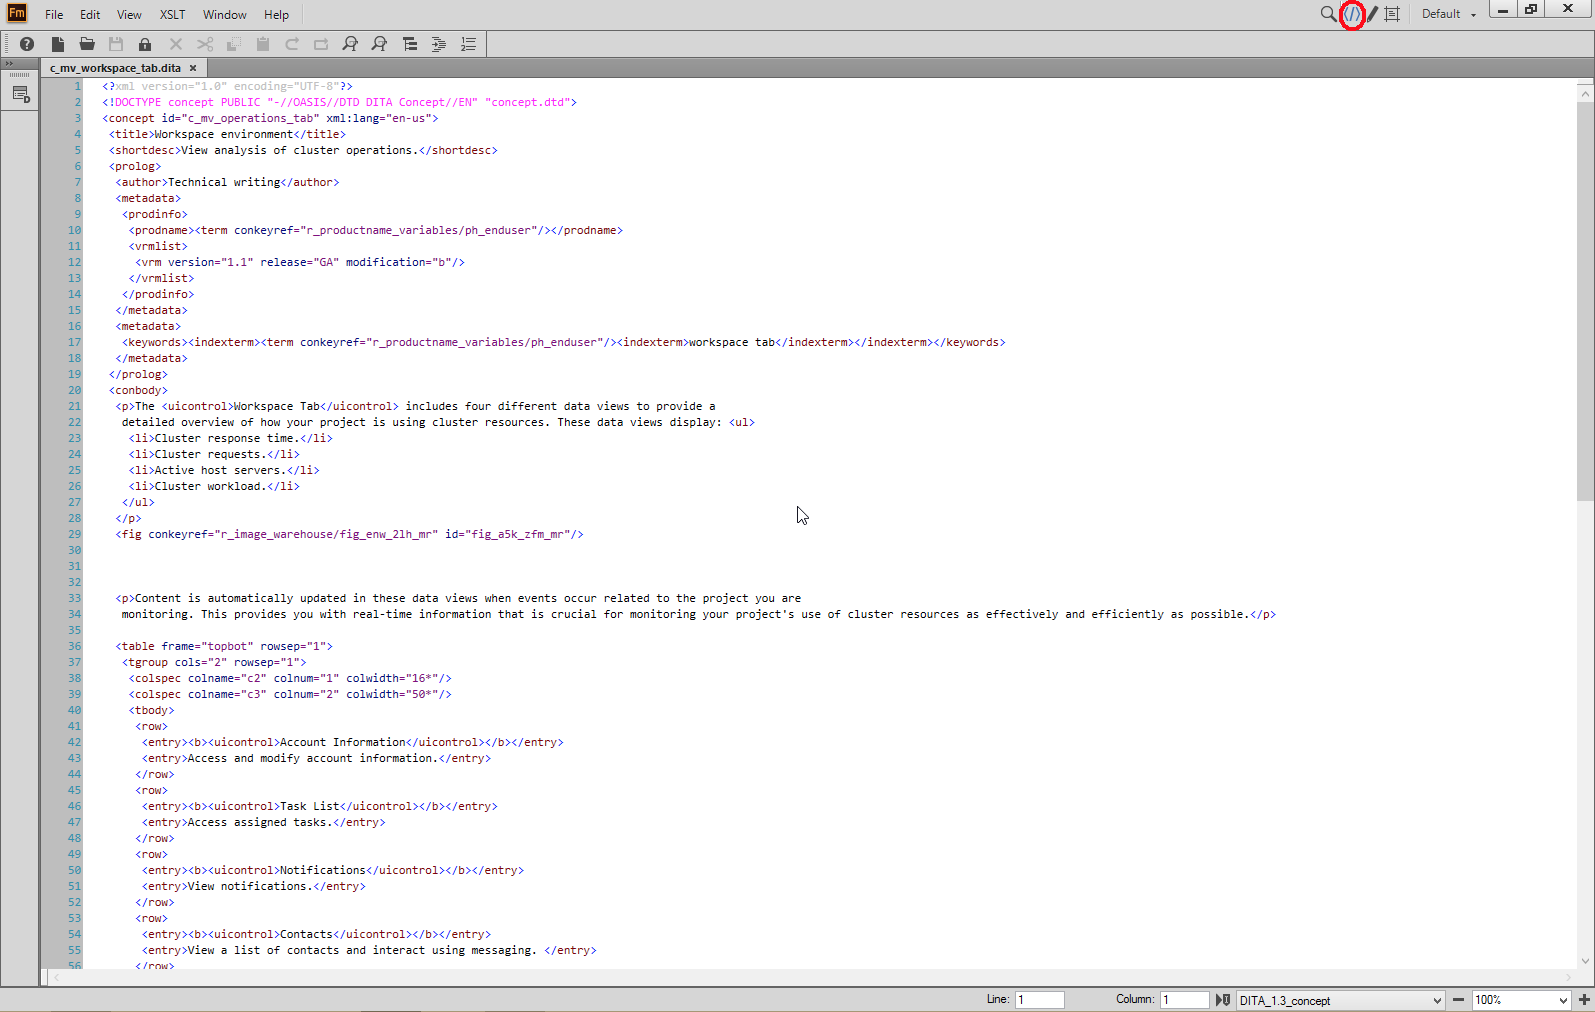
This is the straight-up XML code that makes up your document. The full size of this underlying XML document is only 115 lines of code, and most lines are only a few characters. This is why localization (translation) companies are much happier (translation: they charge you less) when you provide valid XML rather than unstructured binary files for translation.
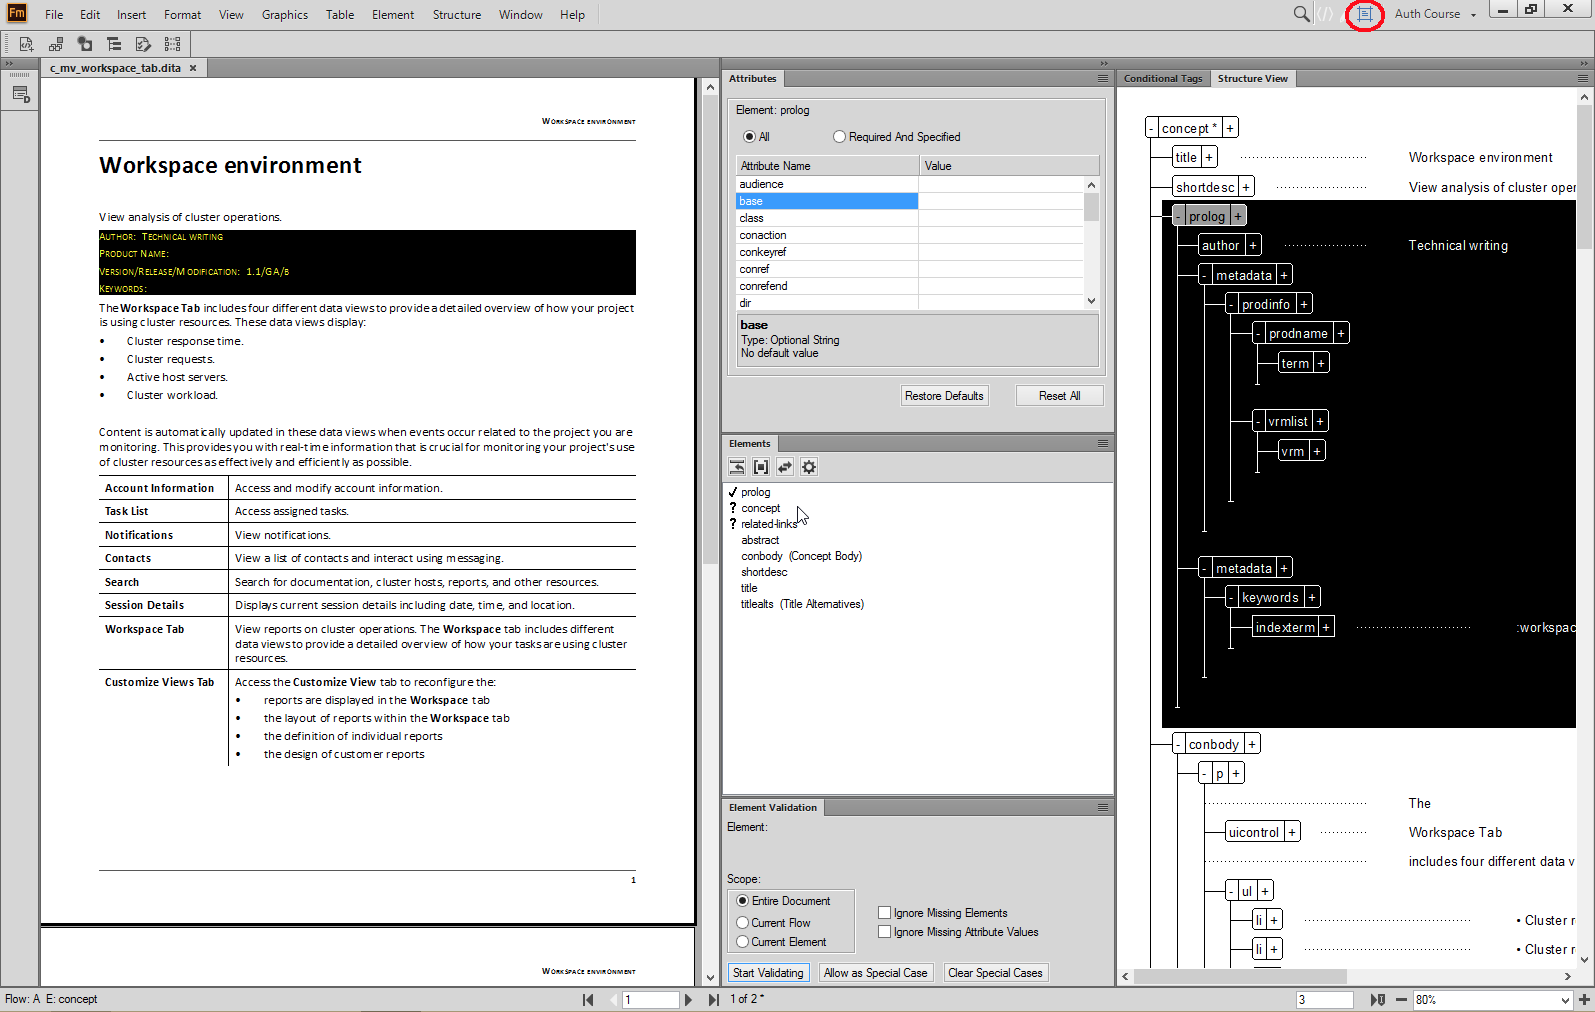
Creating and modifying structured content
For simplicity, I’ll focus on the WYSIWYG view when discussing these controls. The following 5 controls help you manage structured content:
- document window
- attributes pod
- element catalog
- element validation pod
- structure view
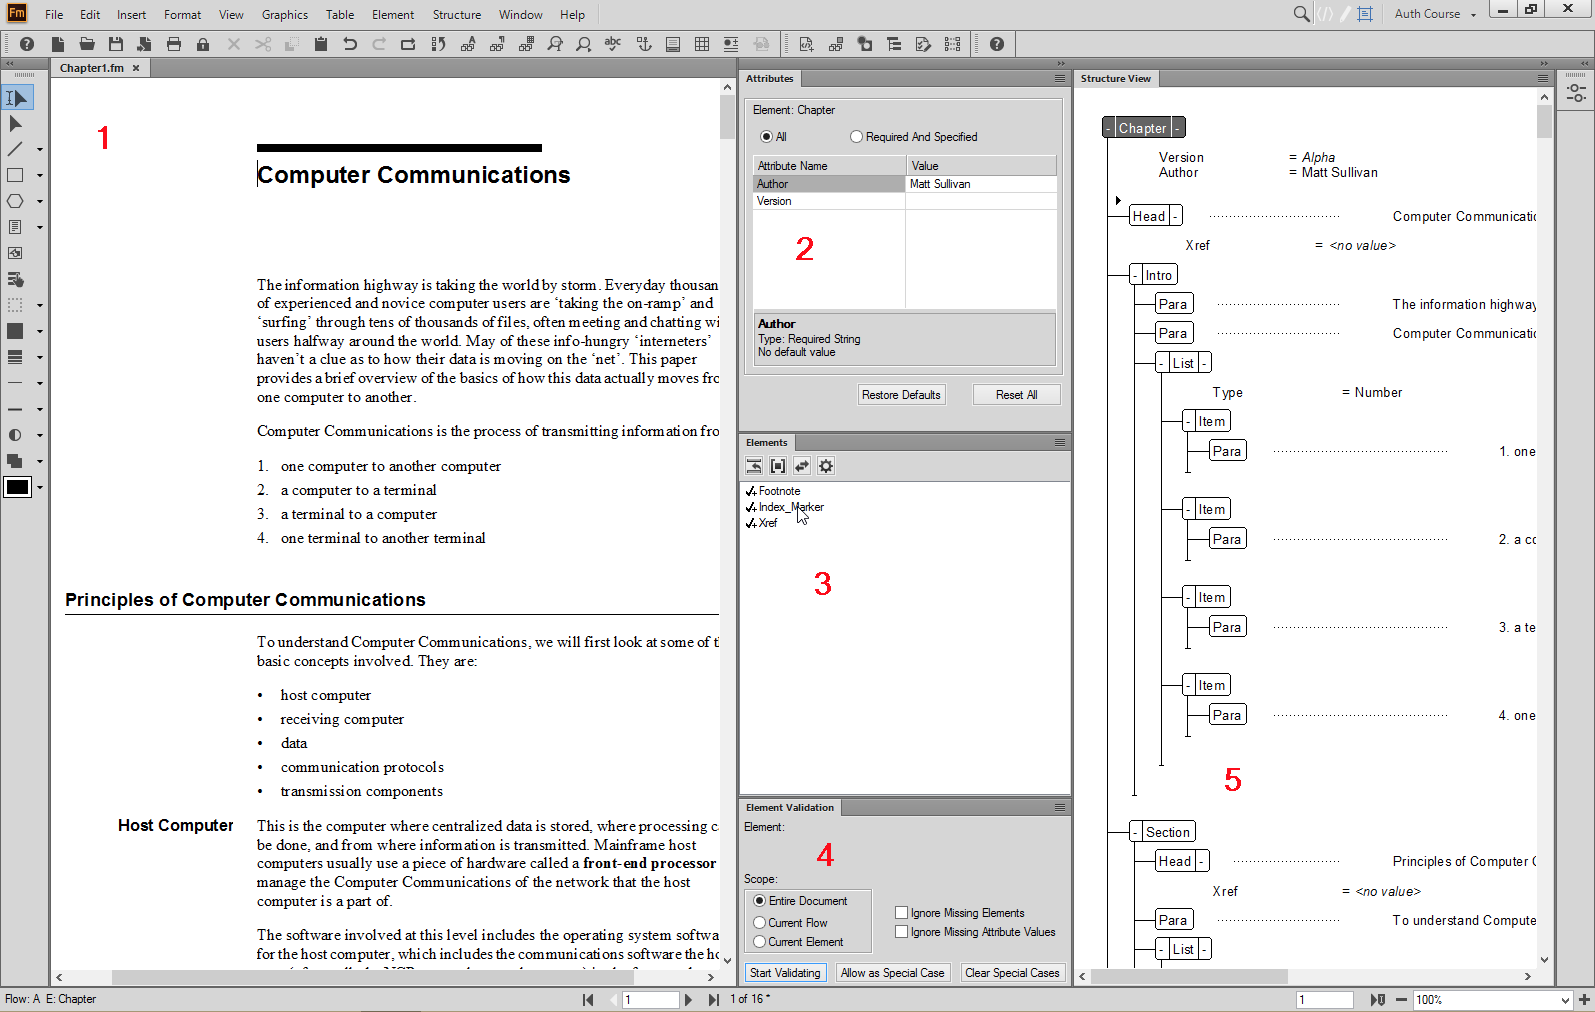
1. Document Window
The document window is where you do the bulk of your writing and editing.
2. Attributes Pod
Used to add metadata to your elements.
3. Element Catalog
This is where you see the available content that you can enter into your document. Set properly, the element catalog will dramatically speed up your content creation and editing.
4. Element Validation Pod
Validation is the process of comparing your content to the specific content model you’re writing to.
5. Structure View
The structure view shows you how your content fits together. The structure view also helps you quickly navigate large sections of your document.
Converting legacy content
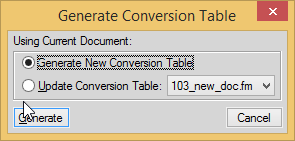
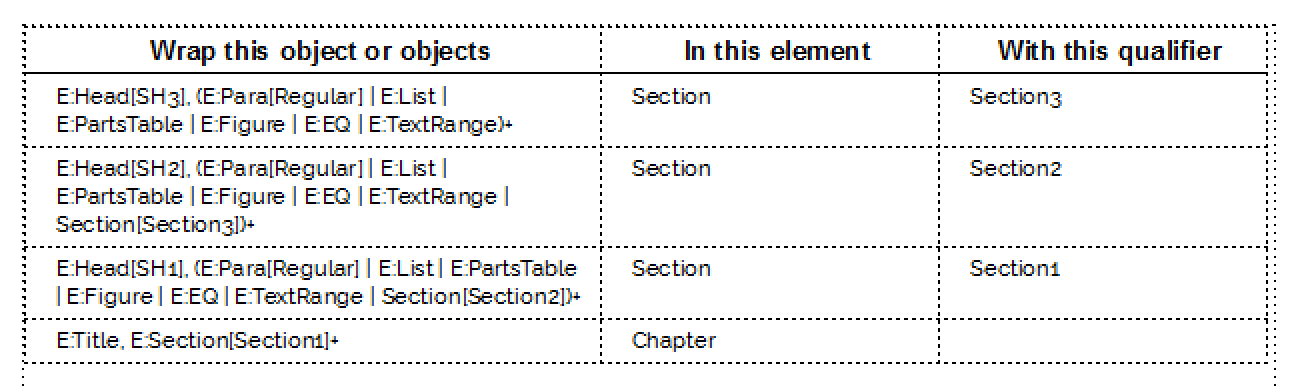
Most unstructured content can be imported into FrameMaker, allowing you to take advantage of applied styles to create rules governing how the content should be structured. Along with mapping paragraph styles to their appropriate elements, a conversion table can specify how elements will nest and wrap to take most of the hand work out of a conversion. Commercially available utilities and custom scripting can take care of most of the other details.
Here’s part of a what a finished conversion table might look like:
If you are interested in more information on converting unstructured content to a structured content model, my Structured EDD Development workbook contains a full chapter with sample files.
Available Tech Comm Tools books
Customizing structure models and structured formatting
Along with built-in models like DITA and S1000D, FrameMaker provides the Structured Application Designer to help you set up the rules needed to use other custom XML or SGML content models.
Running FrameMaker as Administrator (recommended)
When modifying files in your application installation directories you may find you need additional write permissions to save files. Right-click on your FrameMaker application icon to choose Run as Administrator. This will allow you to save files that are normally protected during this FrameMaker session.
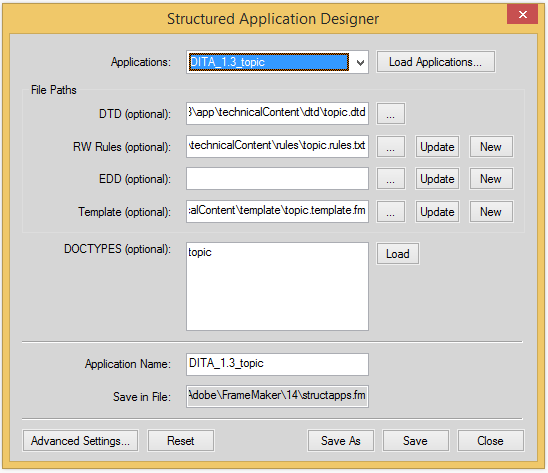
Modifying DITA templates
As DITA is a very popular content model, it makes sense to show you how to get to and modify the DITA templates. In the Structured Applications Definitions Document you can find the following default definitions for a DITA 1.3 topic:

The template file is stored inside the FrameMaker installation directory (represented by the $STRUCTDIR variable in this image) and we can open and modify this file to make branding or other format changes to the default template file.
If you decide to modify this file, I recommend making a backup copy and labeling it something like topic.template.backup.fm so that you don’t have to alter the current path or filename in this definition.
A previous post I wrote for Adobe contains some video for FrameMaker 11 that might help you visualize the process:
For more information on modifying the text formatting in a DITA file, see https://blogs.adobe.com/techcomm/2016/03/customize-framemaker-2015-dita-templates-for-your-corporate-design.html
Changing other DITA options
There are some other minor tweaks you can make to your DITA environment using the EDD and using your DITA initialization files. They include altering the strawman structure you see when starting a new file, and changing the appearance and behavior of helper text designed to guide new users through new file creation.
Want more on this topic?
I delivered a free Adobe webinar on this topic on May 29, 2018.
Go to https://2018-04-26-framemaker-with-matt-sullivan.meetus.adobeevents.com/ to view the recording.
Get more free Adobe FrameMaker training
Learn how FrameMaker saves you time and money, and learn the skills you need to make basic edits to FrameMaker documents.
Sign up for my free Introduction to FrameMaker course here

Join over 4,300 of your peers and get my latest content sent to you for free, along with some of my all-time favorites.