
Easily brand and format digital content with FrameMaker
In Mobilize your content: A FrameMaker Digital Publishing Overview, I showed you how easy it is to produced sophisticated web and mobile content from FrameMaker 2015 files. If you aren’t yet familiar with FrameMaker’s Publish pod, you might want to quickly review it before going on.
In this post I’ll show you how to easily improve upon the default mappings and layout to more closely match your organization’s branding.
As with the previous post, we’ll use the files available at
C:\Program Files (x86)\Adobe\AdobeFrameMaker2015\Samples\UserGuide(Arabic,English,Hebrew)\English\Personal Spaceship User Guide – EN-US.book.
Here’s a brief video overview, with more detail in the post that follows
Ready, set, go!
Starting with the same Users Guide sample files, go to the Publish pod, click on the Change Settings button and choose Edit.

From there, select the Style Mapping tab. Since we have our FrameMaker files already open, you’ll see that your paragraph, character, and other styles are already listed and ready for you to map.
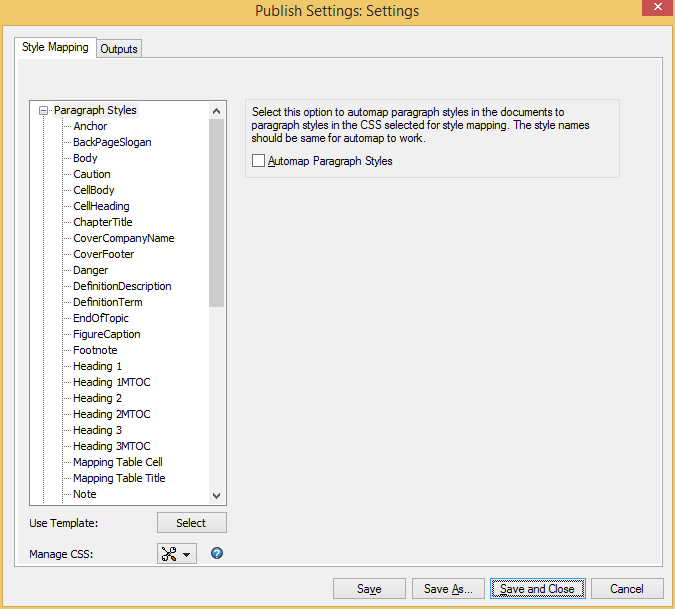
It’s tempting to leverage the existing FrameMaker formatting, but that gives you less control than mapping to a cascading stylesheet (CSS). The more mapping you do to the CSS, the closer you’ll be able to match your organizational branding in the final output. You’ve been warned…print formatting is different than web formatting!
In our example, we’ll start with FrameMaker’s default CSS, and then modify a few things to make it easier to manage our system. The interface is really straightforward. I’ll show you a few of my favorite tweaks, and from there, you’ll get the hang of it and can venture out on your own.
Mapping Paragraph Styles
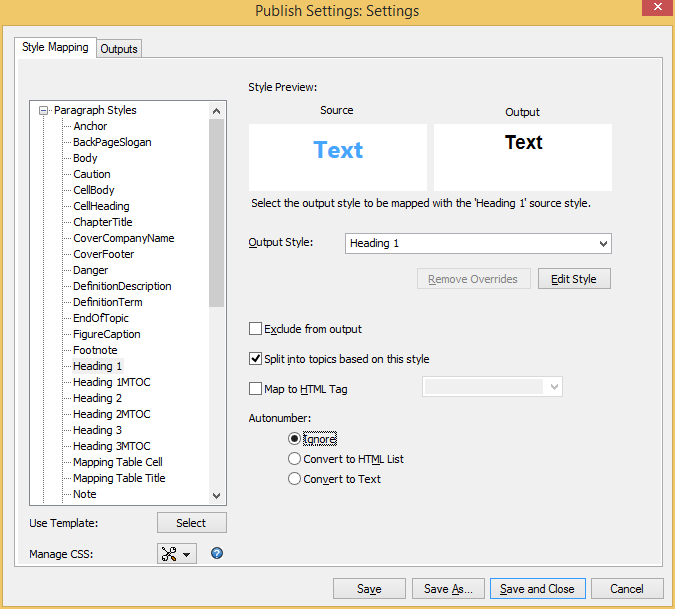
Headings
You’ll probably want to split most FrameMaker documents into more than one web page. For each heading that splits into a topic based on style, set the Output Style to Heading 1 and select the Split into topics based on this style checkbox. For most of my projects, I also choose to ignore heading autonumbering, as it makes less sense to break digital content up by chapter and section.
Body styles
FrameMaker gives you three default indents for your body copy. Use BodyLevel1 for your first (main) body content tag, and use levels 2 and 3 as needed. If you’re indenting beyond the BodyLevel3 tag, consider breaking your headings into more topics.
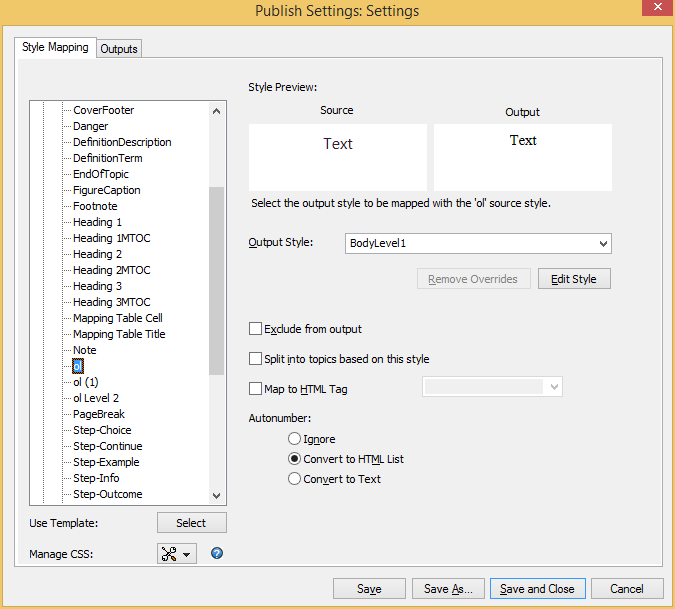
Lists
Set your first-level numbered and bulleted lists to the BodyLevel1 output style, and Convert to HTML List. This will help keep your numbering accurate, and tether the formatting of the list to your main text formatting.
Your second-level lists get the same treatment, but use the BodyLevel2 format.
Paragraph styles without default formats
Once you’ve mapped the content types above, you may need to map other content to custom CSS entries. We’ll look at that below.
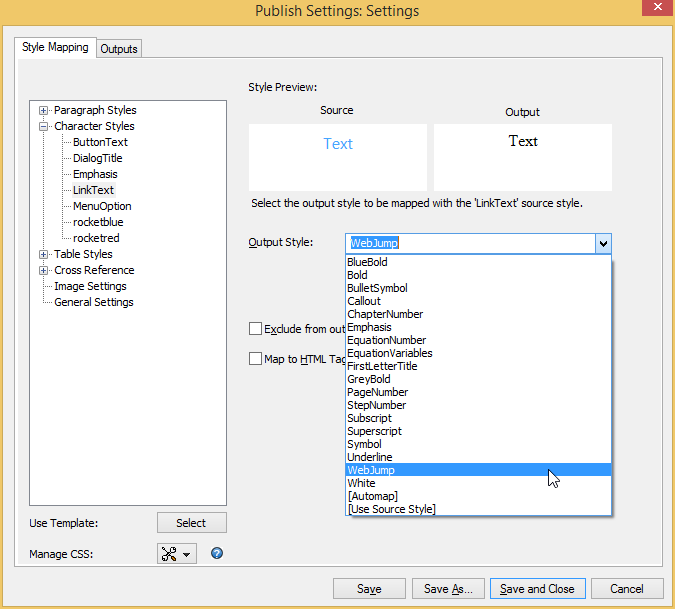
Mapping Character Styles
Map your character styles to Output Styles as available.
Mapping Tables
Table formatting in CSS can be a chore, so I recommend choosing one of the supplied table styles. I like the simple ones, like, Simple Border and Cell Border.
Mapping Cross-References
Digital content doesn’t use page numbers, and often doesn’t use chapter and section numbering, so I find that the easiest way to wrangle my cross-reference formats for web output is to set them all to <$paratext>. I then spot check the converted format in the output. You can type any customizations needed directly into the Output Style field.

Manage CSS
So far we’ve looked at the plug and play options for controlling Publish pod content. Now that we’ve modified things a bit, it’s a good time to peek at the CSS file we’ve created and make a few changes.
Exporting the current CSS
First, select the Manage CSS button, and choose Export.
Next, open the CSS in a text or HTML editor. Here’s a screenshot of my CSS, using the default name, RHstylemapping.css in Notepad++, an OpenSource text editor I highly recommend. One thing that stands out is the many entries that contain
font-family:"Times New Roman";
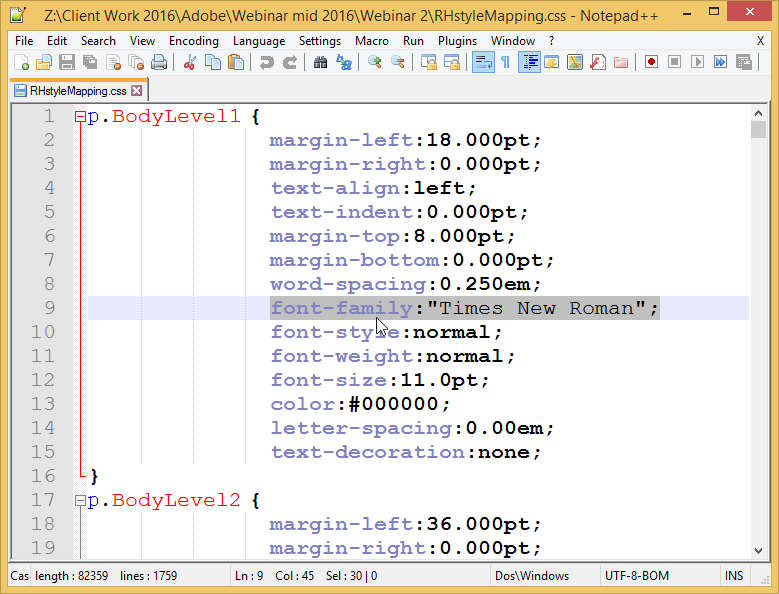
Not only is this repetitive, it keeps me from setting an overall base font for my content, so I’ll do a Find/Change to get rid of those entries, and instead create a body entry at the top, where I can define whatever font set I like.
The body tag is one of the highest-level tags in an HTML page, so the body and the html tags are excellent locations for storing formatting defaults that will cascade to the rest of your content. In fact the p.BodyLevel1 example I’ve used here, nearly every setting other than margin-left can be either deleted or moved to a body definition. Doing this helps highlight the important settings, and allows for more rapid updating of common CSS settings in your project.
**The one “disadvantage” to this approach is that you will need to edit the body element from a text editor, rather from within the FrameMaker Publish Settings dialog.
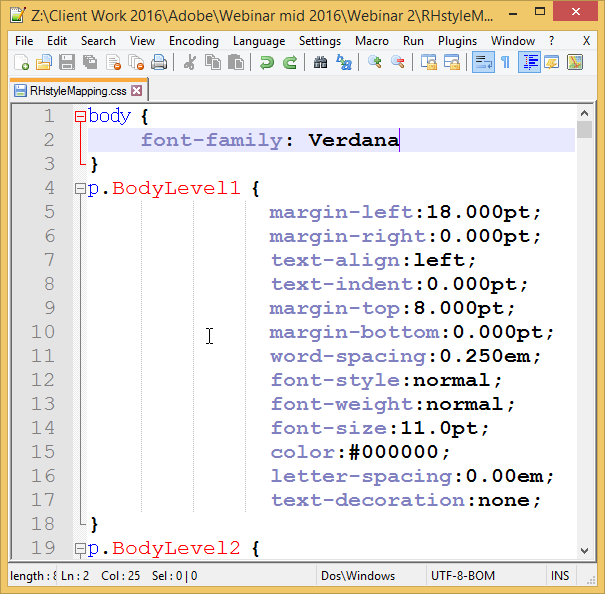
I’d probably use a Google font like Lato these days, but I’ll just use trustworthy Verdana for simplicity. For more information on Google fonts, here’s one of their dialogs,
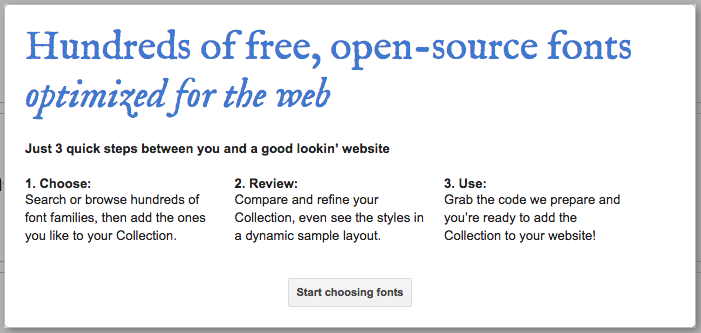
or see https://fonts.google.com/
Once I save the CSS file, I’m ready to bring it back into my FrameMaker project.
Importing the modified CSS
Back in the Publish Settings, select the Manage CSS button once again, but this time choose Import CSS. Specify your modified CSS, confirm, and close any remaining dialogs, saving as necessary.
[adrotate banner=”11″]
Saving your settings
Once you start making specific changes to your mappings and output settings, you should save a project-specific settings file (an STS) where you can easily find it. I save my settings file inside the related FrameMaker project directory. This makes it easy to remember where I’ve stored the settings, and lets me keep different settings for different projects. However, for this example, I’m using files from the Samples directory, so I’ll just save the settings to a logical project directory as Branding.sts.

Matching branding requirements in digital output
After mapping your styles, the next thing is to tweak your layout, or skin. In this section I’ll walk you through the skin editor for the HTML5 output. There are other format options available, but the HTML5 output is the most flexible output, and has the most intuitive editor.
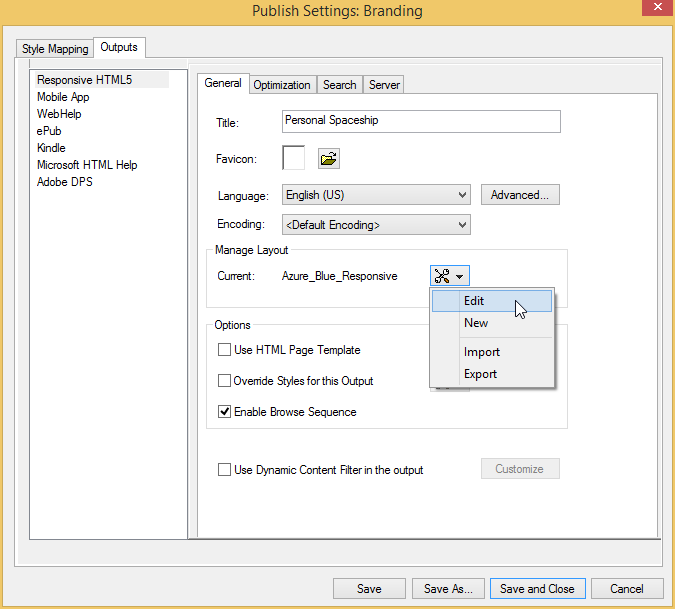
In the Publish Settings dialog, move to the Outputs tab, and select the Responsive HTML5 layout.
The first field, Title, will be what displays in the header of your output. Next is the Favicon option, which is a small graphic that (depending on browser and version) will display in the tab or URL field. You can choose to create an actual favicon image, or just choose a simple square graphic and FrameMaker will resize it to the proper dimensions.
Manage Layout
You can choose any available layout in the Manage Layout section, but for this post I’ll be modifying the Azure_Blue_Responsive layout. Select the Edit option as shown below.
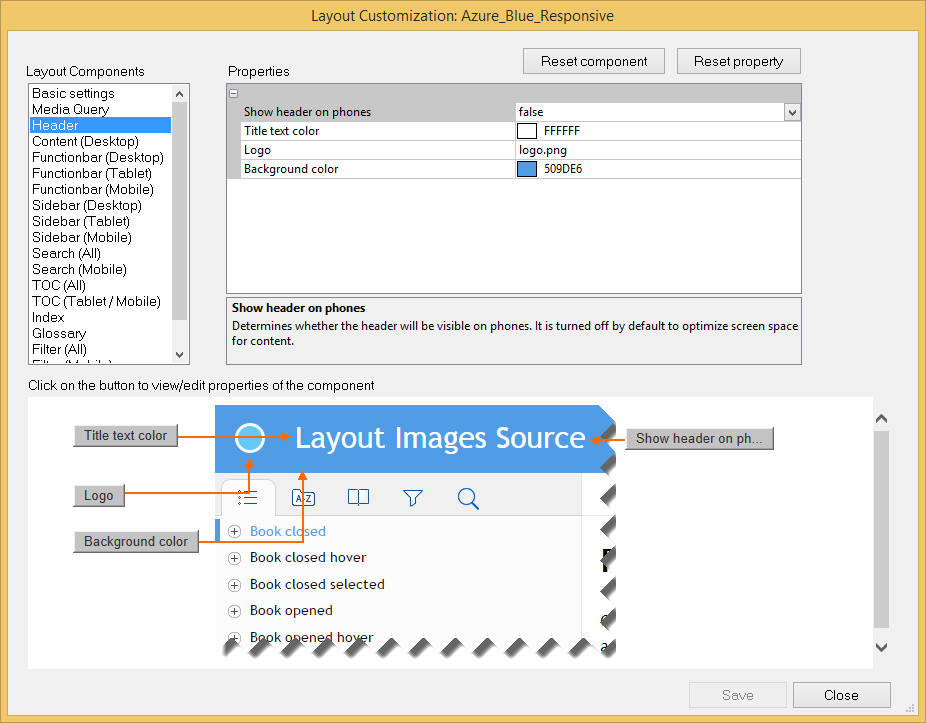
At first glance, judging from the screen shot below, it looks like things are about to get complicated. But here is where things actually get much easier. As you move around in this box, notice that each of the Layout Components entries comes with a separate set of properties, and that each of the components has its own legend below, and that the labels on the legend are linked to the Properties box above. This gives you an incredibly powerful editor with virtually no learning curve!

For example, on the Basic settings, you can set the visibility of the TOC, Index, Glossary, and Filter options. So if you aren’t using one of those components, you can change the value to false to more accurately communicate to users what is available.
You can also specify your own Loading image, if you don’t like the one supplied by default.
Changing the Header
Here is where you can make the biggest impact on your output. By customizing the Logo, Background color, and Title text color, you can quickly and dramatically change how your content is presented online.
Changing the logo
When crafting the logo for your online output (leave this blank to omit the logo) create a square PNG file, with or without transparency. If using a graphic with transparency, choose a matte color the same as your background color. The original name and location of your file isn’t important, as FrameMaker will create a copy (called logo.png) and save it in the appropriate location.
NOTE: In Fm 2019, the logo field appears to be required in the Azure output. Try creating a single-pixel transparent GIF for the logo instead of simply leaving the field blank.
Selecting a background color
Web colors are specified differently than print colors. Get the specific color value from your web designer, or take a screen shot of your web color and use a tool like http://html-color-codes.info/colors-from-image/ to get the color callout.
There are a lot of options available in Layout Customization, so take your time when making choices here. The results will be worth it, especially if you have high standards for matching font, color, and navigational graphics.
Moving on to delivering mobile apps
Now that we’ve got our snappy HTML5 output in order, my third post will discuss the steps necessary to wrap this content into a mobile app for delivery to Android and iOS phones. This is a great way to provide updatable content to your audience without requiring 100% internet access.
Where to go from here
- Post 1: Mobilize your content: A FrameMaker Digital Publishing Overview
- Post 3: Creating iOS and Android apps from your content
- Online course: STC FrameMaker online training course
- Reference book: FrameMaker – Creating and Editing Content
- First section of the book is a free EPUB download
- Available in EPUB or paperback
- Join my email list to get free techcomm, video, and online learning content. I also periodically give away consulting time to list members.
Still want more?
If all you need is a quick fix to your existing system, you can always book a phone or online meeting with me at
https://mattrsullivan.youcanbook.me
It’s the fastest and most direct way to get your problems solved.
About Matt Sullivan
Matt Sullivan is the founder of Tech Comm Tools, and has been helping folks produce better technical communication for almost 20 years. He has trained thousands of people in a dozen Adobe applications, including:
- FrameMaker
- RoboHelp
- Captivate
He specializes in improving workflow and in producing screencasts and other forms of tech comm video. He’s also a big fan of developing online courses because of their potential for depth of training and increased value to the student.
Matt helps organizations produce better content, including video and multimedia, and deliver it digitally to a web and mobile audience.
Join Matt’s email list to be the first to see a series of 25 videos highlighting Technical Communication Suite integration features. Sponsored by Adobe, the series is being billed as Getting Started with Technical Communication Suite and will serve as in introductory course to available TCS integration options.

Join over 4,300 of your peers and get my latest content sent to you for free, along with some of my all-time favorites.
Can you change the header text? Currently mine shows “Responsive HTML5” instead of the name of the book.
Hi Kay, we’ve already discussed this directly, but for the sake of others reading the thread, you can edit the HTML5 skin via the Publish pod. In the editor, you can use the Header section to customize the title, the logo, and other aspects of the header (color, font, etc.)